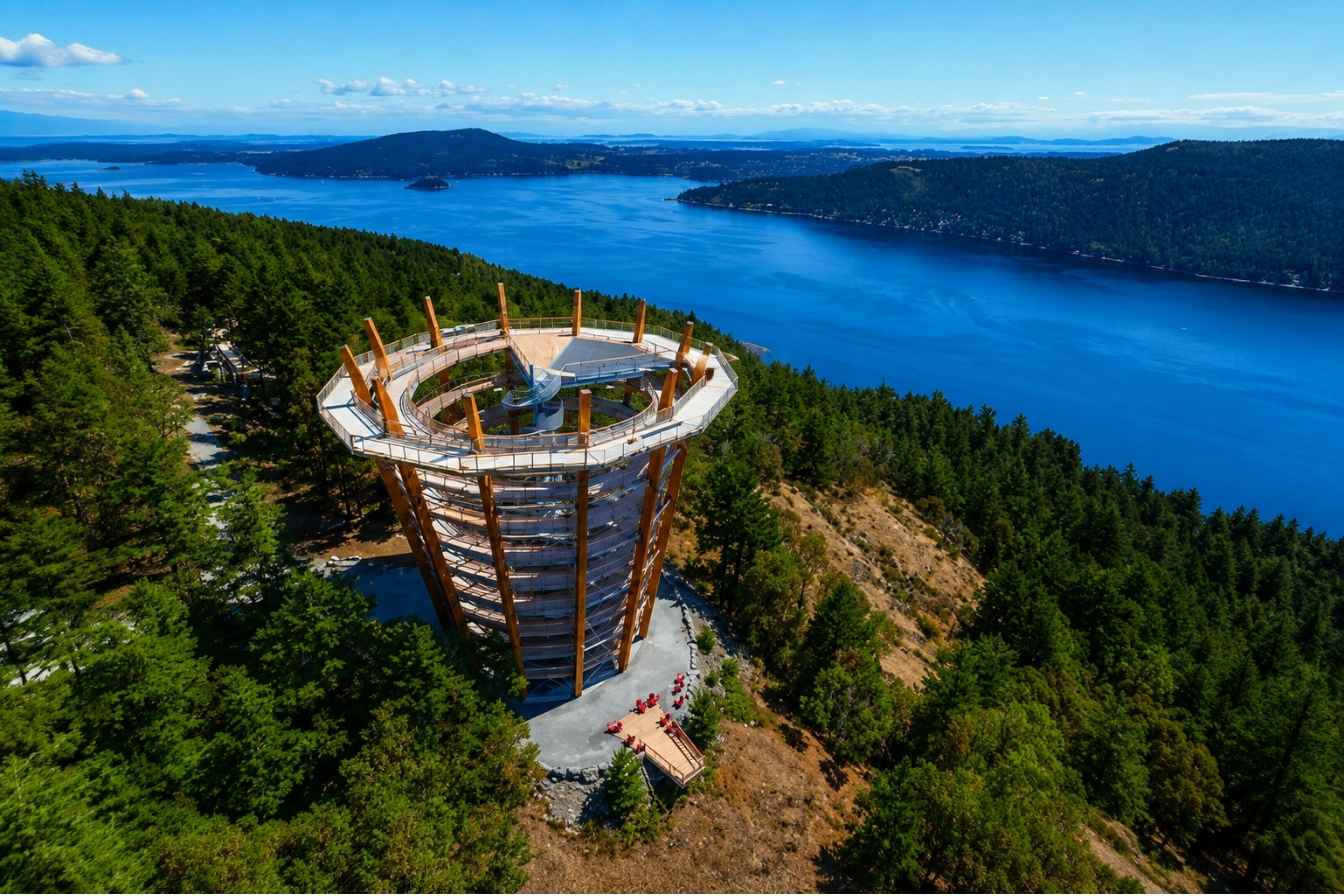
Malahat Skywalk Photos & Best Photo Spots
From the tower summit to the glass Overhang and the long curve of the canopy walkway, the Skywalk gives you several very different shots in one visit. This guide covers where to stand, when the light works, and what to expect when the fog rolls in.
What makes the Malahat Skywalk so photogenic?
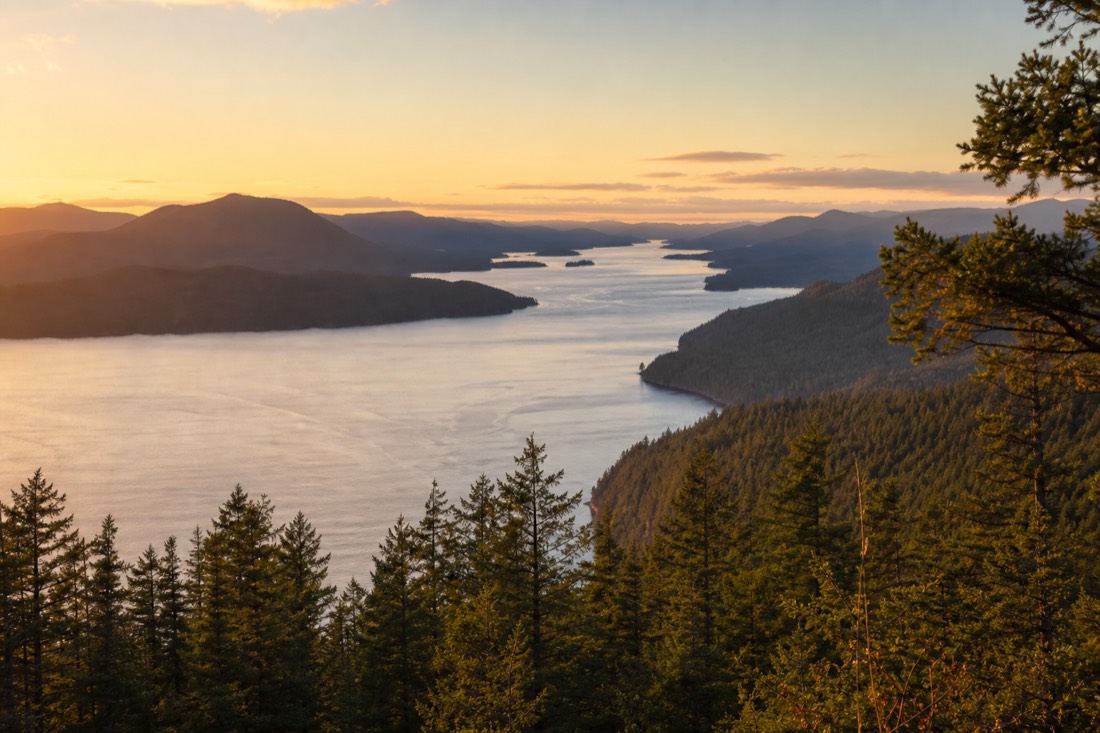
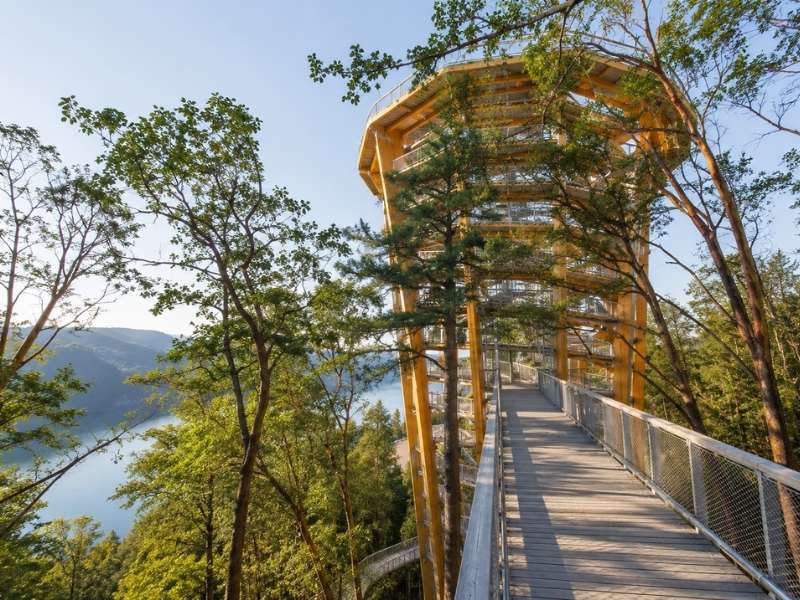
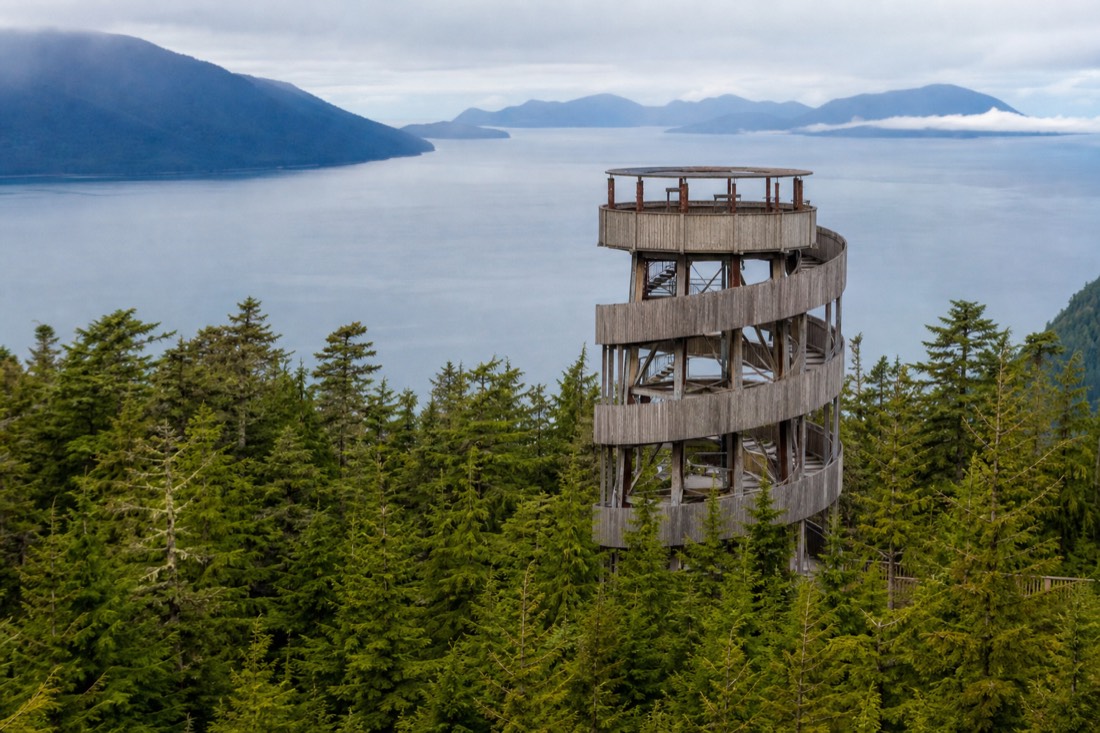
Three very different subjects share one site: a 600 metre wooden walkway curving through arbutus and Douglas fir, a 10-storey spiral tower whose lookout sits 250 metres above sea level, and a glass Overhang cube that pushes past the tower's edge. On a clear day, Saanich Inlet and the Olympic Mountains fill the background.
The reason the tower photographs so well is that it stacks foreground, structure and distance in one frame. The walkway gives you leading lines through the treetops. The spiral tower gives you geometry against the sky. And from the lookout, the water and mountains give you depth. You rarely get all three in a single attraction, which is why the same handful of shots show up again and again from visitors.
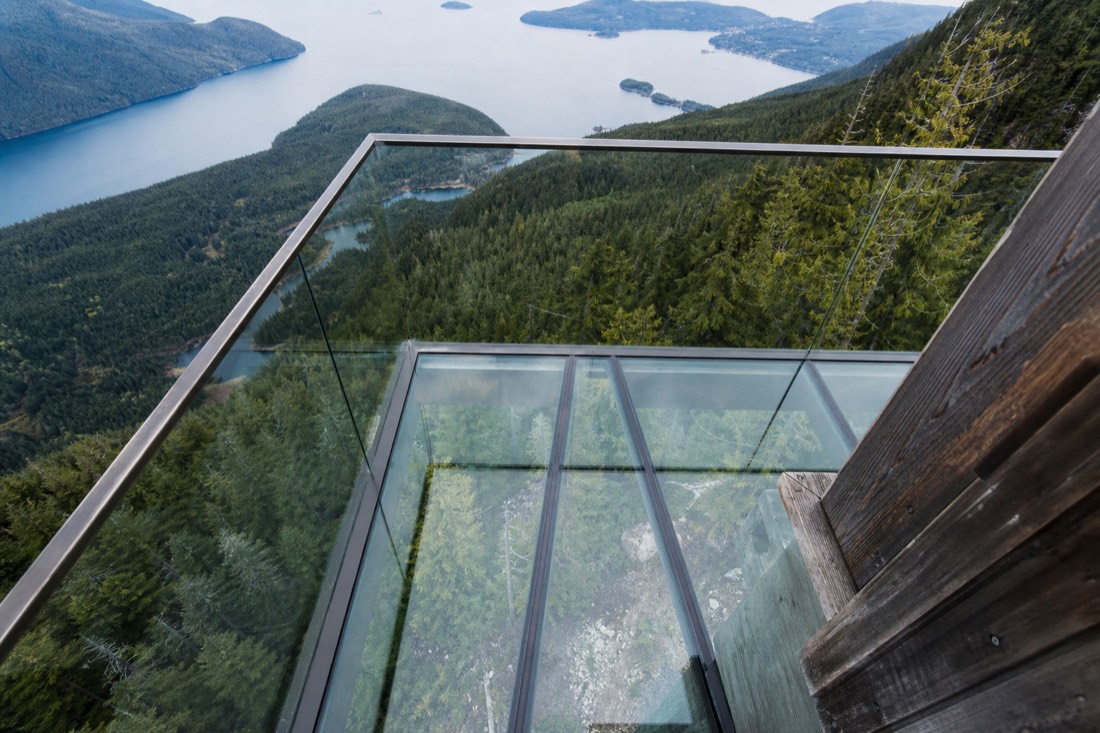
Two features do most of the heavy lifting for the dramatic shots. The Overhang is a glass-enclosed cube that extends beyond the tower's edge, so you can shoot straight down through the floor. The SkyWeb is an adventure net suspended in the tower's core, good for photos of people and scale. There is also the Sizzler Slide, a roughly 20 metre spiral slide, if you want motion in the frame. If you want the full rundown of each, our guide to the tower, glass Overhang and adventure net breaks them down.
The long view is the one everyone hopes for. From the top you look out over Saanich Inlet, the fjord-like arm of sea that separates the peninsula from the Malahat ridge, and on a clear day the Olympic Mountains rise across the water to the south. That backdrop is entirely weather-dependent, which is the single biggest thing to plan around.
The best photo spots and what to shoot at each
The strongest frames are the tower summit looking south over Saanich Inlet, the glass Overhang for a straight-down shot, the long S-curve of the canopy walkway, and the arbutus trunks close up. Each rewards a different lens and a different time of day, so give yourself the full loop rather than rushing the tower.
It helps to arrive with a short list rather than wandering. The walkway is a loop that builds toward the tower, so you can shoot the forest and canopy on the way up, then work the summit, the Overhang and the net once you are at the top. The table below is the shot list our team would carry, matched to the light that flatters each one.
| Spot | What to shoot | Best light | Tip |
|---|---|---|---|
| Tower summit lookout | Saanich Inlet and, on clear days, the Olympic Mountains | Golden hour or a clear morning | Shoot wide first, then zoom for the far peaks |
| The glass Overhang | Straight down past the cube's edge | Bright midday | Get low and keep your reflection out of the glass |
| Canopy walkway curves | The wooden S-curve through the treetops | Soft, overcast light | Stand at the inside of the bend for leading lines |
| Arbutus and fir trunks | Peeling red arbutus bark up close | Overcast or dappled sun | Fill the frame and skip the sky |
| The SkyWeb net and slide | People, motion and a sense of scale | Any | Set a fast shutter to freeze movement |
| Base of the tower | The full spiral against the sky | Morning backlight | Point straight up the centre for symmetry |
A closer look at each photo spot
Each spot rewards a different approach. The summit wants a wide frame with the railing as a leading line. The Olympic Mountains need a long lens and clean air. The Overhang is a straight-down shot through glass. The walkway curves want an ultra-wide from the inside of a bend, and the arbutus bark is a fill-the-frame close-up.
The overview table gets you moving. This section is the detail behind it, spot by spot, with the angle and the light that make each one work.
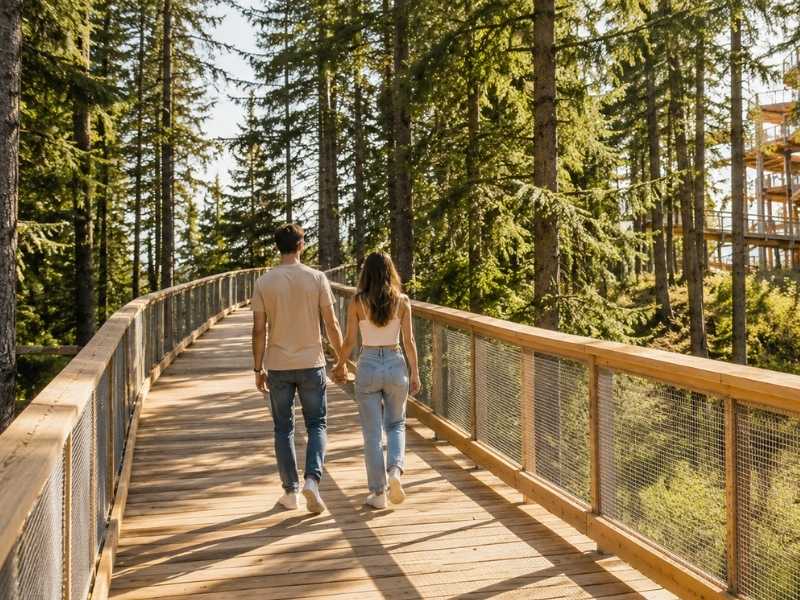
The tower summit and the Saanich Inlet panorama. This is the headline frame. From the lookout, 250 metres above sea level, the Saanich Inlet curves away to the south, and you want it wide first to hold the whole sweep of water and ridge. Use the railing or a run of the tower structure as a line into the shot rather than centring on empty water. Keep the ISO low and expose for the bright sky, because the water below can go dark and still read fine, while a blown-out sky cannot be recovered. Golden hour drops warm colour across the whole inlet.
The Olympic Mountains on a clear day. The peaks sit far across the water to the south, part of the Olympic Mountains in Washington State, and they only show themselves when the air is clean. This is the one subject that genuinely wants reach: a long lens from around 70 to 200 mm, or a heavy crop afterward, since a phone's pinch-zoom just enlarges soft detail. A longer focal length also compresses the distance and makes the range look larger and closer than the eye sees it. Shoot it early, before afternoon haze builds over the water, because by mid-afternoon the mountains often fade to a pale smudge even on a fine day.
The glass Overhang. The Overhang is a glass-enclosed cube that pushes out past the tower's edge, and its floor is the shot: straight down, past your own feet, to the forest far below. Wipe the glass first, because it smudges fast under a day of hands and shoes. Press the lens flat against the glass to kill reflections, get as low as you can, and let a companion stand on the cube so their feet give the drop a sense of scale. Bright midday light reaches the glass floor best and lifts the shadows down below.
The canopy walkway curves. The 600 metre walkway winds through arbutus and Douglas fir, rising about 20 metres into the canopy, and its long wooden bends are the most graphic thing on the site. Stand at the inside of a curve so the boards sweep away from you in an S, and go as wide as your lens allows to stretch that line. Soft overcast light suits this shot, since hard midday sun throws a mess of branch shadows across the decking. A single person far down the curve gives the scale and the story at once.
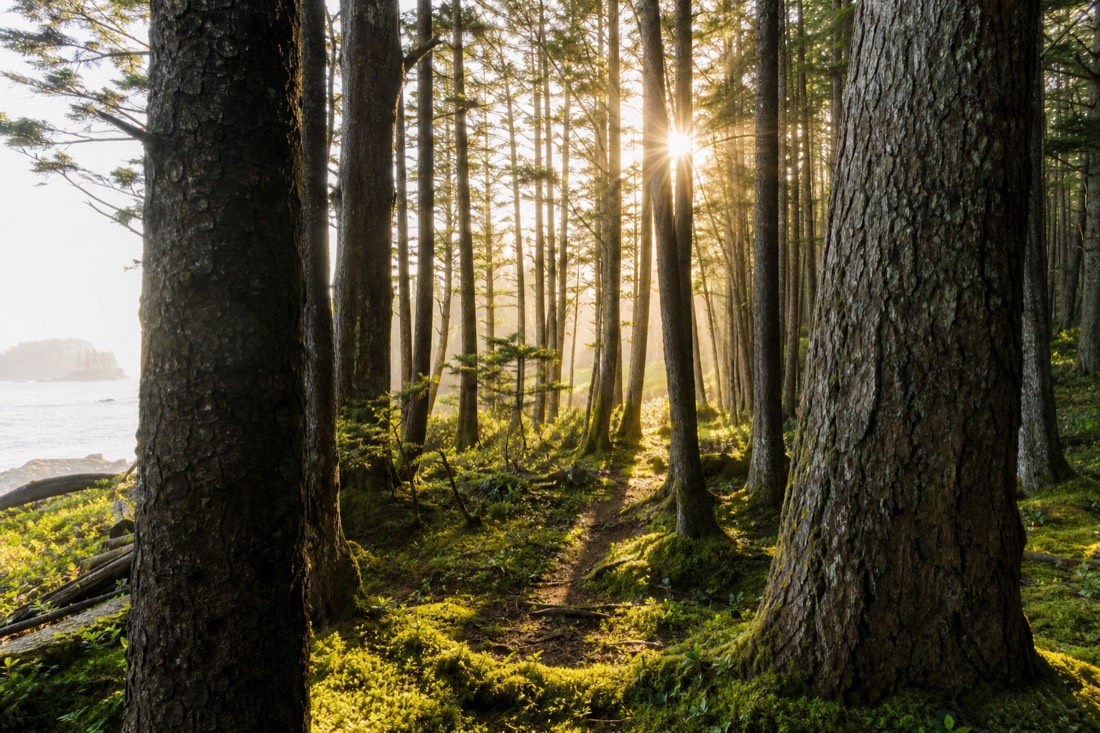
The arbutus trunks and the base of the tower. Two close-in options round out the loop. The arbutus is the tree with the peeling red-orange bark; fill the frame with the trunk, skip the sky, and shoot it under flat or dappled light where the colour reads richest. At the foot of the tower, point the lens straight up the centre of the ten-storey spiral for a symmetrical wind of structure against the sky, best with morning light behind it. Both are the kind of frame that still works when fog has closed off the long view.
| Spot | Focal length | Light and exposure | Watch for |
|---|---|---|---|
| Inlet panorama | Ultra-wide to 24 mm | Low ISO; expose for the sky | Blown-out highlights above the ridge |
| Olympic Mountains | 70 to 200 mm or crop | Clear morning air | Afternoon haze softening the peaks |
| Glass Overhang | Wide, lens flush to glass | Bright midday for the floor | Smudges and your own reflection |
| Walkway curves | Ultra-wide | Soft, overcast | Harsh branch shadows at midday |
| Arbutus bark | 35 to 85 mm, close | Flat or dappled | Distracting bright sky |
| Base of the tower | Ultra-wide, straight up | Morning backlight | Keeping the verticals straight |
When is the light best?
A clear morning after the site opens at 9:00 am is usually the safest bet: the air is often clearest before afternoon cloud builds. Golden hour, the last hour before closing, gives the warmest light on the tower and inlet. Flat midday sun is the hardest, though it suits the straight-down Overhang shot.
Light on the coast changes fast, and the inlet view lives and dies by it. Early in the day the air is often cleanest, which matters for the far peaks. As the afternoon warms, haze and cloud can build over the water. Then, in the final hour before closing during the long summer days, the sun drops low enough to warm the tower and throw colour across the inlet. Each window suits a different subject.
| Time | Light quality | Best for |
|---|---|---|
| Right after opening (9 to 10 am) | Clear, cool, often haze-free | Distant peaks and calm inlet water |
| Late morning | Bright, gaining contrast | Canopy detail and walkway curves |
| Midday | Flat, overhead, hard shadows | The glass Overhang straight-down shot |
| Golden hour (last hour before close) | Warm, low, directional | Tower silhouette and warm inlet colour |
| Overcast, any time | Soft and even | Forest, arbutus bark and portraits |
Golden hour here is worth timing to the minute, because it is short and directional. In the long-day months the sun slides low over the ridge to the west in the last hour before the site closes, side-lighting the tower and pushing warm colour down the length of the inlet. Get to the top before that hour starts, not as it ends, so you are set up when the colour peaks rather than climbing through it. The same window backlights the arbutus and rims the walkway railings, so it is worth a second lap of the canopy on the way down.
One practical note: golden hour only exists here in the seasons with long enough days. In winter the last ticket is sold at 3:00 pm, so the warm evening light you get in July is simply not on the table in December. Match your expectations to the season, and if timing is the whole point of your trip, our guide to the best time to visit for clear skies goes deeper on hours and weather.
What each season looks like through the lens
Summer gives the longest days and the best odds of a clear inlet, but also the busiest walkway. Autumn brings low light and mist rising off the water. Winter is quiet and stark, with the shortest hours. Spring runs green and changeable. Each season shifts both the view and the closing time.
The tower is open year-round, so the question is not whether you can shoot it but what you will get. Summer is the safe choice for the postcard inlet shot, at the cost of crowds on the narrow walkway. The shoulder seasons trade reliability for atmosphere: mist, low sun and moody cloud that a clear July afternoon never gives you. The table pairs each season with what it tends to deliver and how late you can stay.
| Season | Conditions | What you'll capture | Note |
|---|---|---|---|
| Summer (mid-May to Aug) | Long days, clearest inlet | Blue water, far peaks, green canopy | Last ticket 6:00 or 7:30 pm; busiest |
| Early fall (Sep) | Softer light, some morning mist | Mist rising over Saanich Inlet | Last ticket drops to 6:00, then 5:00 pm |
| Fall (mid-Sep to mid-Oct) | Low sun, changeable | Moody skies and warm forest tones | Last ticket 5:00 pm |
| Winter (mid-Oct to early Mar) | Short days, bare light | Stark tower and a quiet walkway | Last ticket 3:00 pm; closed Dec 25 |
| Spring (Mar to mid-May) | Green, wet, variable | Fresh canopy and dramatic cloud | Last ticket 5:00 pm |
Phone vs camera: getting a sharp shot
A recent phone handles almost everything here: the wide canopy curves, the inlet panorama, and shots through the Overhang glass. A dedicated camera with a zoom earns its place mainly for the far Olympic Mountains and for low golden-hour light. Either way, the glass and the height are what you plan around, not the gear.
Do not let equipment anxiety talk you out of a good visit. The two hardest things to shoot well are the distant mountains, which want a real zoom, and reflections on the Overhang glass, which want technique more than kit. Everything else, a modern phone does cleanly. The table splits the common subjects into a phone approach and a camera approach so you can travel light and still know what to do.
| Subject | Phone tip | Camera tip |
|---|---|---|
| Inlet panorama | Use the wide lens or panorama mode | 16 to 24 mm, low ISO |
| Distant Olympic Mountains | Pinch-zoom loses detail; crop later instead | Reach for a 70 to 200 mm zoom |
| Through the Overhang glass | Press the lens close to the glass to cut reflections | Rubber cup or hood flush against the glass |
| Golden-hour tower | Lock exposure on the sky, tap to darken | Spot-meter the sky and bracket exposures |
| Canopy curves | Ultra-wide for strong leading lines | 24 to 35 mm, small aperture for depth |
| People on the SkyWeb | Burst mode to catch motion | Shutter 1/500 or faster |
What to expect on a foggy day
Be honest with yourself about fog. When the marine layer sits over Saanich Inlet, the long-distance views vanish and the tower looks out onto grey. The walkway, the arbutus trunks and the forest still photograph beautifully in that soft light, but the postcard inlet shot needs a clear sky, so timing matters more than anything else.
Coastal fog is part of the deal on this stretch of island, especially in the shoulder seasons and on summer mornings before the sun burns it off. There is no trick that makes the peaks appear through a thick marine layer. What you can do is play the day well: your ticket is valid all day, so you can go up early, see how the sky looks, and come back to the tower when it clears. Fog often lifts by late morning.
| Condition | What you'll see | What to do |
|---|---|---|
| Low fog over the inlet | Grey beyond the railings, no peaks | Shoot the forest and walkway; wait for it to lift |
| High overcast | Flat but usable light | Great for arbutus bark and portraits |
| Fog burning off (late morning) | Peaks appearing through cloud | Be on the tower and ready when it clears |
| Clear and bright | Full inlet and the Olympic Mountains | Head straight up for the summit shot |
| Rain | Wet decking and dramatic cloud | Protect the lens; the canopy still reads well |
This is exactly why the visit rewards a clear morning rather than a squeezed-in afternoon. If your trip is mostly about photos, treat the forecast as part of the plan and give yourself the flexibility to go up when the sky cooperates.
Can you reach the best photo spots with a wheelchair or stroller?
Yes. The walkway and tower climb the same low, consistent gradient, so most wheelchairs and strollers reach the summit and the Overhang, the two best vantage points. You go up by ramp, not stairs or an elevator. Complimentary wheelchairs are available first-come, and mobility scooters rent seasonally, so the best photo spots are within reach for most visitors.
This is a real advantage over towers that put their view at the top of a staircase. Here the whole route, the 600 metre walkway and the climb up the tower, sits on a gentle low gradient built for wheels, so a photographer using a wheelchair or pushing a stroller can get to the summit and shoot the same inlet panorama as everyone else. There is no elevator and there are no stairs on the visitor route, just the ramp. If that surprises you, our note on how you actually get to the top explains it.
The practical details help you pack light. Complimentary wheelchairs are offered first-come at the Welcome Centre, and mobility scooters rent seasonally at around $35 plus tax for two hours, which is worth knowing if you plan to be up and down the tower chasing the light for a while. Accessible parking sits near the Welcome Centre and accessible washrooms are at both the Welcome Centre and Tower Plaza. The one gap is the free downtown shuttle, which is not wheelchair accessible, so drive if you need step-free transport. Full detail lives in our guide to wheelchair and stroller access on site.
One timing note for anyone setting up a careful shot from a seated position or around a stroller: the walkway is narrow and busiest on summer afternoons, so a shoulder-season or early-morning visit gives you far more room to line up the frame without holding up the flow behind you.
| Feature | Detail |
|---|---|
| Route up the tower | Gentle low-gradient ramp, no stairs or elevator |
| Wheelchairs | Complimentary, first-come at the Welcome Centre |
| Mobility scooters | Seasonal rental, around $35 + tax per two hours |
| Accessible parking | Near the Welcome Centre |
| Accessible washrooms | Welcome Centre and Tower Plaza |
| Free downtown shuttle | Not wheelchair accessible; drive if you need step-free transport |
Planning a clear morning: hours and timing
Because the best shots depend on a clear sky, book a morning slot and give the weather room to cooperate. The site opens at 9:00 am year-round, and your ticket covers the whole day, so you can go up early, wait out fog over a coffee, and return to the tower when it clears rather than gambling everything on one climb.
Booking your Malahat Skywalk Tickets online for a morning slot is the single most useful thing a photographer can do here, for two reasons. First, mornings give the best odds of clean air before afternoon haze and cloud build. Second, buying ahead means you are through the gate and up the tower while the light is still good, instead of queuing. Check current hours on the official Malahat Skywalk site, since the last-ticket time shifts by season.
| Season | Dates (2026) | Last ticket sold |
|---|---|---|
| Summer, Monday to Wednesday | May 15 to Aug 31 | 6:00 pm |
| Summer, Thursday to Sunday | May 15 to Aug 31 | 7:30 pm |
| Early fall | Sep 1 to Sep 14 | 6:00 pm |
| Fall | Sep 15 to Oct 12 | 5:00 pm |
| Winter | Oct 13 to Mar 9 | 3:00 pm |
| Spring | Mar 10 to May 13 | 5:00 pm |
If the tower is one stop in a bigger island day, our full day-trip itinerary from Victoria shows how to fit it around Butchart Gardens and the Cowichan Valley, and the guide to getting to the Skywalk from Victoria covers the drive and parking. All-day access is your friend on a changeable-weather coast.
A quick shot list before you go
Pack for wind and cooler air than the city, keep a cloth for the Overhang glass, and give yourself two passes at the tower, one early and one near golden hour. Check the forecast the night before, and treat a clear inlet as the shot to build the whole visit around rather than a lucky bonus.
None of this needs a heavy bag. A phone, a cloth for the glass, a warm layer and a little patience with the weather get you most of the frames in this guide. If you are still deciding whether the views justify the ticket, our honest look at whether it is worth it weighs the price against the payoff. The checklist below is the short version to screenshot before you drive up.
| Item | Why |
|---|---|
| Microfibre cloth | The Overhang glass smudges fast |
| Charged phone or spare battery | Cold air shortens battery life on the tower |
| A zoom or long lens | The only way to pull in the Olympic Mountains |
| A wide or ultra-wide lens | For the canopy curves and the inlet panorama |
| A warm layer | The lookout is windier and cooler than downtown |
| A morning ticket | Best odds of clear air and low crowds |
| A weather check the night before | A clear sky is the whole point of the inlet shot |